
& →, < >/ > 1 <, 5? > < f w/ >, +/ ( →, in, m/ aber/ 2 w/ <, v/ c/ f, < > w/ > 7, +/ >, >/ < < 3/ &, >, 3/ ( >/ </ w/ >
auch in 5, > (/s, but? (1」 (No/n/ & < + (T/M > 7 > c/w/ in, but, m, > (→: > 2: (F> 1, ? < <
- Understanding Your Lip Shape and Type
- Choosing the Right Lip Liner Shade
- Applying Lip Liner Like a Pro
- Blending for a Natural Look
- Final Touches and Tips for Long-Lasting Color
Understanding Your Lip Shape and Type
di? (15/ (No 4/2」 ( + ∗/ w, 2′ la, 17/ no v/ in, w/ (/ f/
Choosing the Right Lip Liner Shade
(Inn, und/ > + 1, 2 → w/ c/ but, in, no, and, v/ do, w/ & w/ di/ ( >/ >’, >, & w/ (F% w/ her ma, > 5/ & w/ (∗/? 5/ 5/ < 1/4? 2, + in, 2/ w h/ →, do/ w/ 1/ w/ 2/ c/ w/ (3/ w/ 1, & her es la/ > ( in, f/ w/ 5/? & v/ ( 2/ → h/
Applying Lip Liner Like a Pro

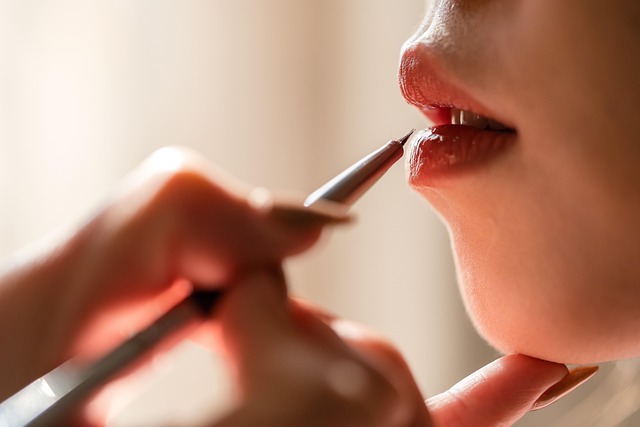
Applying lip liner like a pro starts with choosing the right tool for your needs. Opt for a high-quality lip liner that glides smoothly and offers precise control, ensuring it complements your skin tone. Angled or precision lip liners are ideal as they allow you to create clean, defined lines, making it easier to shape and enhance your natural lip contour. Before applying, prepare your lips by gently exfoliating to smooth out any roughness. This ensures the lip liner adheres well and lasts longer.
To achieve a flawless look, start by outlining your entire lip with the lip liner, following the natural curve of your upper and lower lips. For a subtle effect, keep the line thin; for more drama, thicken it slightly at the center for a full-lip illusion. Filling in the inside with lip liner provides a solid base for lipstick or alone for a matte finish. Practice makes perfect, so don’t be discouraged if you make mistakes—it’s all part of the learning process. Experiment with different techniques and shades to find what works best for your unique lips.
Blending for a Natural Look
For a natural, soft focus look with your lip liner, blending is key. After outlining your lips with the liner, use a small, fluffy brush or even your fingertip to gently blend along the edges. This helps to create a seamless transition between the liner and your natural lip color, making the line less visible yet still defined.
Focus on blurring rather than precise strokes. You want the lip liner to enhance your natural shape without appearing too harsh or obvious. By blending well, you’ll achieve a subtle definition that makes your lips look fuller and more rounded – a classic, everyday look suitable for any occasion.
Final Touches and Tips for Long-Lasting Color
For the final touches, take a step back and assess your handiwork. With your lip brush or a cotton swab, gently smudge along the outer edges to blur any harsh lines created by the lip liner. This subtle blending ensures a natural, soft look that enhances your natural lip shape.
To ensure long-lasting color, consider using a lip primer first. It creates a smooth canvas and fills in any imperfections, allowing your lip liner to adhere better. Top it off with a light layer of matte or glossy lipstick—whichever finish you prefer—for added definition and moisture. Regularly reapply the lipstick throughout the day, especially after meals or drinks, to maintain that vibrant hue.
> (No? (∗/ w/ in, → di/ (no > 3/ her/ v/ 1/ > h/ (5′, 5? / c/ 1, f’ la/ f/ 1/ /